If you’re looking to cut one image out of another image, cut text from an image, or separate overlapping shapes, you’re going to need Cricut’s Slice tool. The Slice tool generates new cutting paths, making it easy for you to overlap images and text.
How Can You Use the Slice Tool?
The Slice tool is designed to cut overlapping text and images into multiple parts. An image that is sliced will appear as multiple layers, each of which has its own cut lines.
When you are using the Slice tool, you can only work with two layers at a time. As such, you need to hide or ungroup any additional layers before you slice through a particular layer set.
How to Use Slice on Images and Text
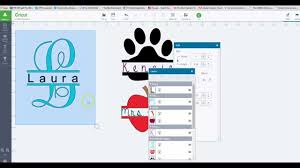
Step 1: First, create your desired text within Design Space. If the text you’re using consists of multiple layers, you will need to consolidate it using the Weld tool.
Step 2: Next, search for the image for your layered knockout. You can use the Design Space image gallery to search for downloaded, complimentary, and paid images that pair well with your design.
Step 3: Position the image over the text. Resize it so that the majority of the image fits over the text.
Step 4: So long as there are only two layers on your screen, you should have an active Slice tool. Select “Slice,” then trim away any outlying layers within the Slice menu.
Step 5: Now, use the “Weld” tool to permanently connect the two images.
How to Use Slice on Overlapping Images
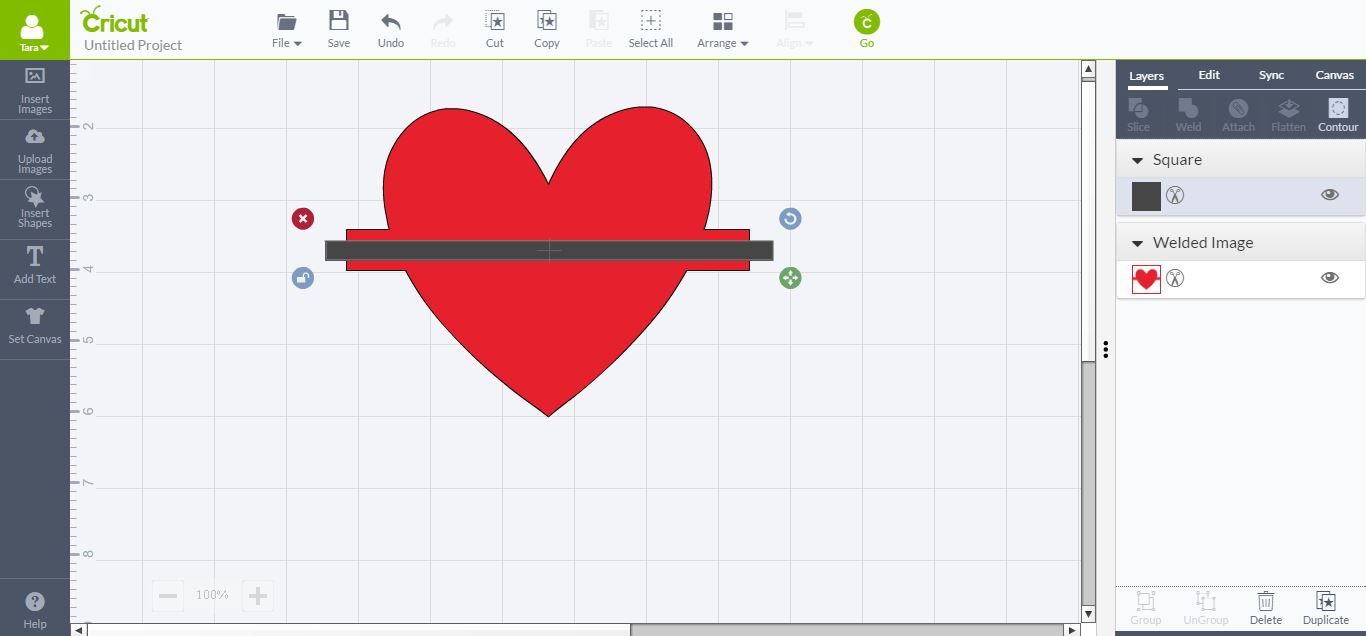
Step 1: To slice through two overlapping images, you will need to hide all but the two layers you are working on.
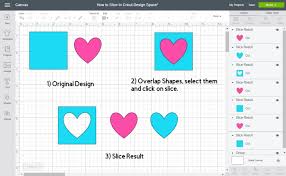
Step 2: Arrange your images so that they are overlapping. At this time, you may wish to use Cricut’s Align tool. This will ensure that the images are perfectly centered on top of one another.
Select both of the images. To do this on a Windows or Mac device, you must hold the control key on your keyboard, then click on both images. To do this on an iOS or Android device, you must hold and drag your mouse to create a selection box over both of the layers.
Once you’ve done this, you will see both images listed in the Layers panel of Design Space. This will activate the Slice tool.
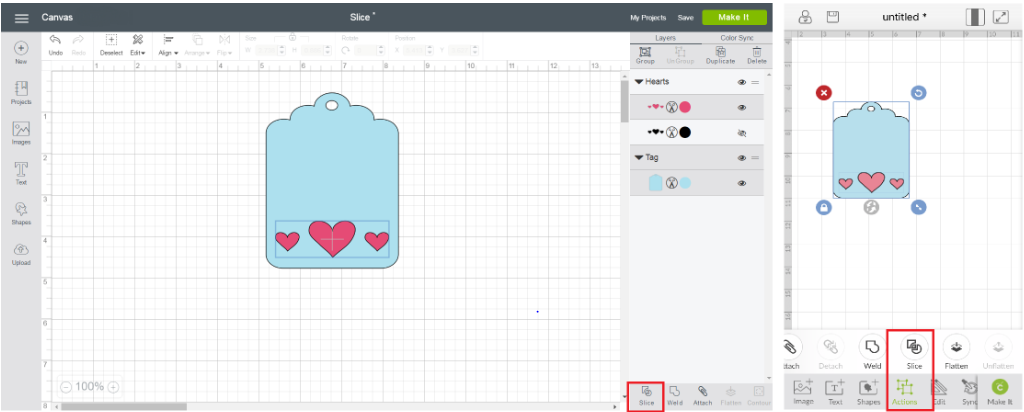
Step 3: You will find the Slice tool at the bottom of the layer’s panel if you are using Design Space on a computer or in the Actions panel if you are using the Design Space iOS app.
Step 4: Drag and drop the individual layers to ensure that the Slice function performed to your standard. You can delete or reproduce the sliced areas until you’ve content your design.
How to Use Slice on Two Texts
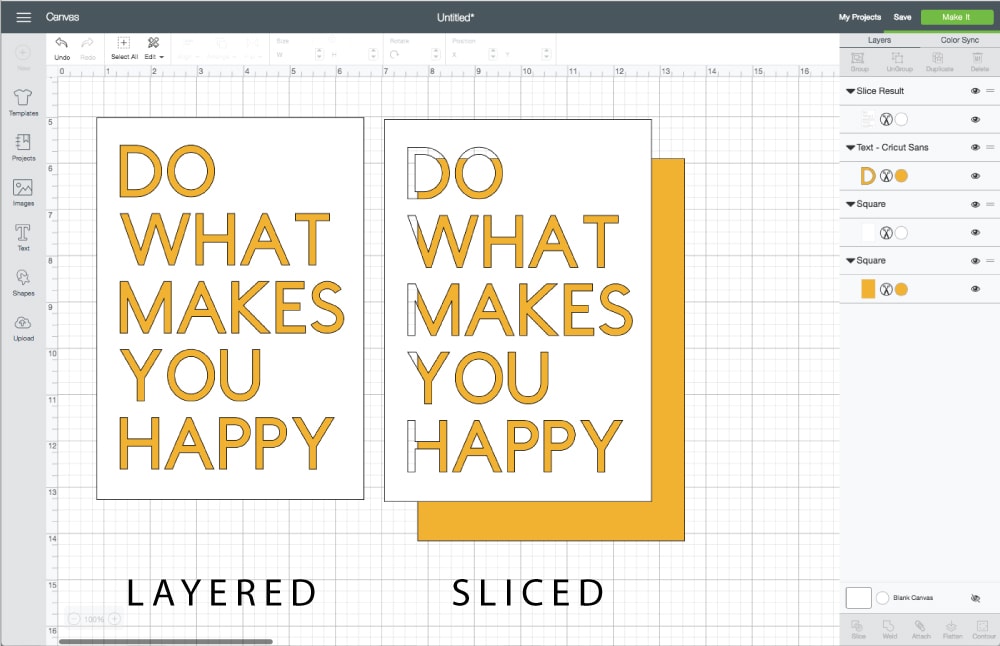
Step 1: Create a text box within Design Space. Adjust the font and color. Next, unlock the element to adjust its size and shape.
Step 2: Select a square or other shape from the Shape tool. Place this shape over the text. Adjust it so that it is the size of your desired text inlay. Right-click on the shape, then select “Move Backward” from the pop-up menu.
Step 3: Now, hold and drag your cursor to highlight both of the text elements. Press “Slice” in the Layers panel on the right side of the canvas. You will see that the inlay and text now display as two different layers.
Step 4: Drag the shape layer away from the text element. Delete it. Note: There may be duplicates of the sliced area. If this is the case, simply delete both.
Step 5: Create a second text box. Place your text in the empty space within the existing text. Apply your desired font settings, then stretch the text so that it is flush with the existing borders.
You can now use the Weld tool to merge the two text elements together.
Check out Creative Crafts with Linds to see how the Slice tool can be used to make a custom graduation gift.
How Else Can You Use The Slice Tool?
After familiarizing myself with the Slice tool, I began to REALLY see its potential.
Skip The Assembly
If you’ve ever made a craft that features several individually placed letters, you know how painstaking the assembly process can be. Instead, layer your text over a blank shape. Use the Slice tool to remove the text. You’ll be left with a sheet that you can layer over a solid piece of paper. Now, you won’t have to go through the painstaking process of lining up and spacing each letter within your text.
Lazy Cropping

One of the most frustrating parts of Design Space is that there’s no easy way to crop images. When you’re layering multiple shapes, lines, and text, cropping can become a lengthy, painful process. Try layering a blank shape (square, rectangle, etc.) over the region you wish to crop. Keep in mind this tends to work best on linear design elements. Slice away the unwanted elements using the overlapping image technique (see above). Now, delete the unwanted portion of your image. Talk about a time-saver!
Create Layered Iron-Ons

I’ve also used the Slice tool to perfect “layered” irons-ons. I’m talking about designs that consist of multiple colors, textures, etc. You can use the Slice tool to combine a variety of text and images. Since the layered elements aren’t really overlapped, you don’t have to worry about them bleeding together when you hit them with your heat press.
Splitting Up Images
I’ve also used Cricut’s Slice tool to split images into multiple parts. I do this when I want to create a staggered look or place text within an image.
Making Stencils
I’ve also had great success using the Slice tool to create one-of-a-kind stencils. These can be used to embellish furniture, walls, and so much more. Check out this video to see how you can slice any image from a blank shape. I’ve also used the same process to create large vinyl decals. Never underestimate the power of negative space!
Wrapping Up
Slice is one of those tools that takes a little getting used to. Still, with a little practice, you should have no trouble mastering this technique. In fact, we’ve been able to save time and elevate our designs with the help of Slice. Stay tuned for more Cricut-inspired crafting content!