You can add color and texture to any Cricut craft project by using the Print Then Cut feature. To do this, you’ll need an inkjet printer, a Cricut Maker or Cricut Explore, Design Space, and a killer design.
Step 1: Create an Image
Develop your project within Design Space. Use a printable image from the Cricut image gallery, or consolidate a multilayered project so that can be printed from your home printer.
You can filter your image search so that it only comes up with printable images. These will feature a small printer inlay within the preview screen. The Filter menu is located on the right side of the Cartridge search bar. You’ll find “Printables” at the bottom of the “Type” menu. You can also refine your search so that it only turns up uploaded, complimentary, paid, or Cricut Access images and font.
You can change the size, color, and other aspects of the Printables within your Design Space canvas. All Printable images already have a print linetype.
Step 2: Making a Printable Image
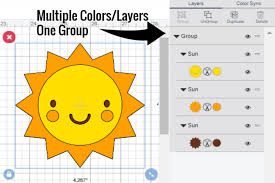
Use the Flatten tool to consolidate multiple layers and create a single printable image. The Flatten button is located in the layers panel on the right side of Design Space.
Make sure that all of the layers within your design are probably aligned and styled before you use Flatten. While you will be able to undo this effect, you can only do so when it is the last step that you took.
Once you’ve flattened an image, it will see a Print Then Cut icon appear below it. It will appear as a single layer within the Layers panel and have a Print linetype.
Step 3: Set Up Your Printer
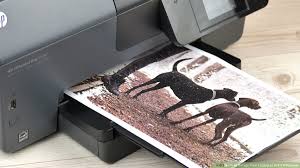
Next, you’ll need to set up your printer. Keep in mind that you will need a regular inkjet printer, printer ink, and printing material. Connect the printer to the device that you are using Design Space on. This should be the same device that is paired with your Cricut machine.
Load the printer tray with your desired material. You may print on any inkjet-compatible material, including peel-and-stick vinyl, cardstock, laser printer paper, and printable sticker sheets.
STep 4: Print
Once you’ve settled on a printable image for your project, you can print it using an ordinary inkjet printer. Make sure that you are using “Printables” or that you have converted your images to a print linetype before proceeding. Click “Make It” within Design Space.
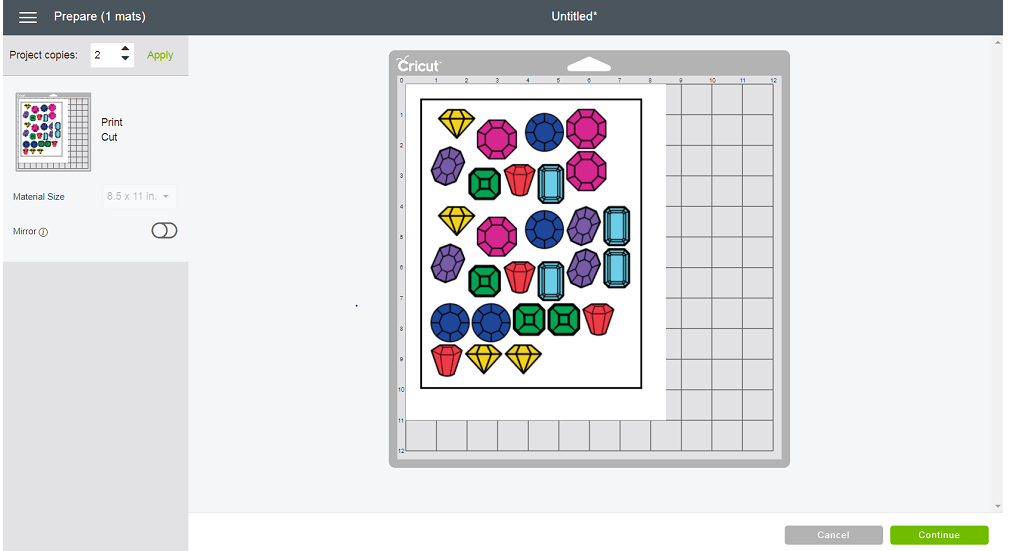
A preview screen will pop up. You should see the image you have been working on with a rectangular cut online around it. Depending on the number and size of the elements in your design, the “Prepare” icon may display one more mats.
You will notice that you can change the size of the material you wish to print on. The maximum material size is 8.5 by 11 inches. You can also toggle the “Mirror” setting to print a mirror image of your design.
When you’re happy with your choices, click “Continue.” This will bring you to a window where you can select your printer, material, load tools, and mat. Select “Send to Printer” to open the “Print setup”window.
Select your printer, input the number of copies you’d like to print, and toggle “Bleed” on or off. Click “Print.”
Step 5: Mount Your Mats

Mount your printed design onto the appropriate Cricut mat, then feed the cutting mat into your Cricut machine. We use the Cricut LightGrip mat whenever we’re working with standard inkjet printer paper.
Step 6: Scan Your Designs Using Your Cricut Machine
Your Cricut machine will scan the cutting mat before cutting the image. To ensure the best possible results, you will need to place your materials on the correct cutting mat. The paper should be placed on the top left side of the cutting mat. The mat should have an adhesive surface that holds the material in place.
According to the experts over at Cricut, reflective, colored, or patterned materials are likely to interfere with the Cricut sensor’s ability to read the cut lines. As such, they recommend that users only print their designs on standard, white inkjet printer paper that measures 8.5 by 11 inches.
Step 7: Use Your Cricut to Cut Your Design
Once the Cricut machine successfully scans a printed design, it can get to work cutting out the individual pieces. If you turned on “Bleed” when you were selecting your printing settings, you’ll notice that the color extends all the way to the border of your design. Otherwise, your design will have blank margins.
Tips
If you’re still struggling to use the Print Then Cut feature, you might need to do a little troubleshooting. Here are a few simple steps you can take to guarantee your success.
Do It All In One Session
Cricut strongly advises that users complete all of the Print Then Cut steps in one session. Use the same device and browser for the smoothest possible results. Never attempt to print a design outside of Design Space. The image needs embedded cut lines so that it can be scanned by your Cricut.
Issues? Try Calibrating Your Cricut
If you’re using a Windows/Mac or iOS to Print Then Cut, you may be able to calibrate your machine to improve the focus of your Cricut’s sensors. The “Calibration” button is located under the “Canvas” heading on the left side of the Design Space canvas. Once you click “Calibration,” you must select “Get the most accurate cuts for Print Then Cut.” Select the printer that you will be using, then print a calibration sheet. Place the calibration sheet on a Cricut mat, then feed it into your Cricut machine. Press “Go.” You will be prompted to answer a question regarding the accuracy of your printed sample. If you say that the sample cut was inaccurate, you will have to perform a second calibration. You will then follow a number of steps where you will have to input numbers from the grid on your printed sample. You will continue this until you are satisfied with the results of your calibration.
Check out Cricut.com for more tips and tricks for using the PRint Then Cut feature. Cricut also offers Member Care services.
Enjoy!
I’ve had so much with Cricut’s Print Then Cut feature. It’s allowed me to combine text and images to create one-of-a-kind paper pennants, stickers, labels, and more. While there are plenty of projects that call for layered materials, I find that the Print Then Cut enables me to make the most out of my materials. I can save time and money by using a standard inkjet printer to create dynamic designs. My Cricut does the rest of the heavy lifting. I’m not missing my scissors one bit!